Section: 29
Hours: 5
I worked on installing the control column assembly today. I started by trimming the corner off of the bearings and then riveting them onto the column. I was able to use the pneumatic squeezer to set these rivets.
It took me a couple tries to figure out how to slide the control column into position. It easily fits if you position the control arm pointing up and then rotate it into position after sliding it through the ribs into position.
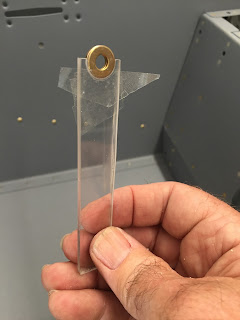
I then slid bolts into both ends of the column to hold it in place and then began the arduous process of inserting the washers to capture the ends on the bearings. Here you can see the washers after inserting them. You bolt up one side and then work on the opposite side, adding shim washers as necessary to eliminate side to side movement of the assembly.
I cut out a washer holder to aid in inserting the washers. It takes a lot of patience (and practice) to get the washers in place and then slip the bolt through. And you have to do it multiple times to get the spacing correct.
Here is the assembly in place. The control arm in the center points towards the floor. I had a hard time finding any drawings showing the positioning- I had to skip multiple chapters ahead before finding a drawing. It would be nice to have some old fashioned 2-D drawings of the airplane to figure these things out.


No comments:
Post a Comment