Section: 22
Hours: 8
A piece of stainless steel tubing is inserted as a counter weight in the leading edge of the ailerons. You have to match drill multiple holes to the tubing. I tried hand drilling a couple of these holes but the stainless is really tough and it is difficult to keep the bit from wandering off center. The result is an out of round hole and an enlargement of the hole in the aluminum skin. I built a jig to hold the aileron assembly so the holes would be vertically aligned. I then drilled the holes using my drill press. The drill press runs at lower rpms and I used a little cutting oil. This ended up being a much better method to drill the holes.
Disclaimer: This blog is to provide others insight into my experience and for my own historical purposes. Airplane construction is a serious affair. I have no authoritative skills relating to airplane construction. As such, any use of the information contained on this blog is at your own risk.
Saturday, October 31, 2015
Friday, October 30, 2015
Section: 22
Hours: 8
I finished up prepping the rest of the small aileron parts. Holes are drilled, deburred, counter sunk / dimpled. Edges are filed and polished. I recently purchased an air die grinder and some scotch brite polishing wheels. It made quick work of finishing the interior holes in the spars.
Hours: 8
I finished up prepping the rest of the small aileron parts. Holes are drilled, deburred, counter sunk / dimpled. Edges are filed and polished. I recently purchased an air die grinder and some scotch brite polishing wheels. It made quick work of finishing the interior holes in the spars.
Thursday, October 29, 2015
Section: 13, 22
Hours: 8
I started work on the wings by finishing the edges of the flap hinge brackets. They were sitting there and the edges were just begging to be polished. This is totally out of order with the manual but I did it anyway.
That got me to thinking about what order I wanted to build the wings in. It was really a hassle building the tail cone because it took up so much room. I know the wings eventually will also have a large space requirement. I decided that I will complete as many of the smaller components of the wing as I can before I start work on the spars. Also, while the weather is still good, I'm going to try to get as many parts prepped and primed as I can. Then later this winter I can stay in the warm dry garage and work on assembling parts. My plan of attack is to complete the ailerons, flaps and leading edges and fuel tanks first. I can store them out of the way and then have more space for working on the spars and center portions of the wings.
I started prepping the aileron parts. There are 32 ribs/stiffeners that have to be cut and formed from channel provided in the kit. I put together a cutting jig to make the diagonal cuts easy using my band saw. Of course the first stiffener slipped in the jig the first time I used it so I had to fabricate another one from the trim sheet scrap left over from the empennage kit. After that it went fairly quickly.
My shop helper graduated from Puppy Training II class tonight! I'm going to have to get one of those bumper stickers that says "My Aussie is smarter than your honor student"
Hours: 8
I started work on the wings by finishing the edges of the flap hinge brackets. They were sitting there and the edges were just begging to be polished. This is totally out of order with the manual but I did it anyway.
That got me to thinking about what order I wanted to build the wings in. It was really a hassle building the tail cone because it took up so much room. I know the wings eventually will also have a large space requirement. I decided that I will complete as many of the smaller components of the wing as I can before I start work on the spars. Also, while the weather is still good, I'm going to try to get as many parts prepped and primed as I can. Then later this winter I can stay in the warm dry garage and work on assembling parts. My plan of attack is to complete the ailerons, flaps and leading edges and fuel tanks first. I can store them out of the way and then have more space for working on the spars and center portions of the wings.
I started prepping the aileron parts. There are 32 ribs/stiffeners that have to be cut and formed from channel provided in the kit. I put together a cutting jig to make the diagonal cuts easy using my band saw. Of course the first stiffener slipped in the jig the first time I used it so I had to fabricate another one from the trim sheet scrap left over from the empennage kit. After that it went fairly quickly.
Wednesday, October 28, 2015
Section: 13
Hours: 8
We moved the tail cone into our living room behind the sofa. I've been storing my completed parts there to keep them safe and away from the dust in the garage. It makes a great conversation piece for when we have guests.
I finished organizing the wing kit components and took an inventory of all the small parts. All parts plus some extras were accounted for and checked off the inventory list. I also broke down the wing crates and pulled out all the staples so I can use the wood for fixtures, jigs, etc. It's great having the crates off the floor. It should make building the wings much easier.
Tuesday, October 27, 2015
Section: 10
Hours: 8
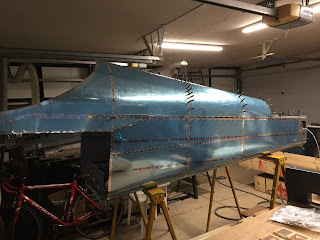
Deb helped me rivet the rest of the skins on the tail cone. I was able to reach all the rivets from the open ends and didn't have to resort to crawling into the tail cone. However, it might have been more comfortable to crawl in and lie on my back. Deb again did an excellent job- no skin dents or smilies. I did have to drill out and reshoot a couple rivets, but that was my fault for not getting the bucking bar in the right place a couple of times.
Monday, October 26, 2015
Section: 13
Hours: 8
Deb wasn't available today for riveting so I worked on unpacking the wing kit. I used the now empty empennage crate to make shelves to store the wing components. Having the wing kit parts all visible and organized on the shelves should cut down on the rummaging for parts time. I wish I had done this for the empennage kit- live and learn.
Sunday, October 25, 2015
Section: 10
Hours: 8
I spent the last couple days at a formation flying clinic at Visalia, CA.
The vertical stabilizer has to be match drilled to the rear bulkhead. I ran into some fit problems - the nut plates on the side skins run into the vertical stab. The only way to get the vstab into position is to push the side skins out leaving a noticeable bulge in the skins. I looked at several other builders pictures and they all have the same problem. I'll contact Vans tech support before final assembly to see what they say about this.
I attached the upper skins and Deb helped me rivet one side.
Wednesday, October 21, 2015
Section: 10
Hours: 8
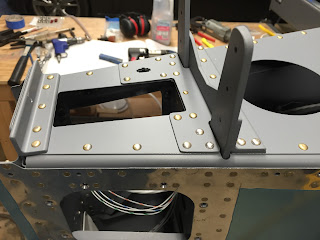
After attaching the side skins you install the rear deck. I was able to squeeze most of the rivets in this area, but there were some AN470AD3 rivets that I had to shoot with the rivet gun. A couple of those were really squirrely and I had to drill them out and retry a couple times. Also, be careful in this area. The rivet lengths called out in the plans are incorrect in a couple spots. Make sure you use your rivet length measure tool and grab the right length rivets.
With the deck installed I was able to straighten out some of the wire runs.
Subscribe to:
Posts (Atom)


