Section: 15
Hours: 2.5
Today I riveted the wing sub spar to the ribs and finished up section 15.
Section: 16
Hours: 2.5
I started section 16. Here the inboard top wing skin and the wing walk doublers are clecoed to the wing. I final drilled all the holes common to the skin and the doublers and also drilled holes for the nut plates that will attach to the inboard edge of the skin. My pneumatic cleco insertion tool came in handy today (attached to yellow hose).
I'm working on the left and the right wings simultaneously. Once you figure out how to do a set of operations on one wing it's easy to do the second. I have the wings arranged so they are mirror imaged which makes it easy to transfer between them.
Disclaimer: This blog is to provide others insight into my experience and for my own historical purposes. Airplane construction is a serious affair. I have no authoritative skills relating to airplane construction. As such, any use of the information contained on this blog is at your own risk.
Showing posts with label Section 15. Show all posts
Tuesday, April 19, 2016
Monday, April 18, 2016
Section: 15
Hours: 6
Here I'm using a 5/8" and a 7/16" socket and my vise to seat a bearing in the aileron bracket inner support piece. The bearing body is a tight fit, but once properly inserted, the bearing moves freely.
These three pieces get riveted together and combined capture the bearing. The pockets in the side pieces still had clearance even after priming, although, I was careful not to load up too much primer in the sockets.
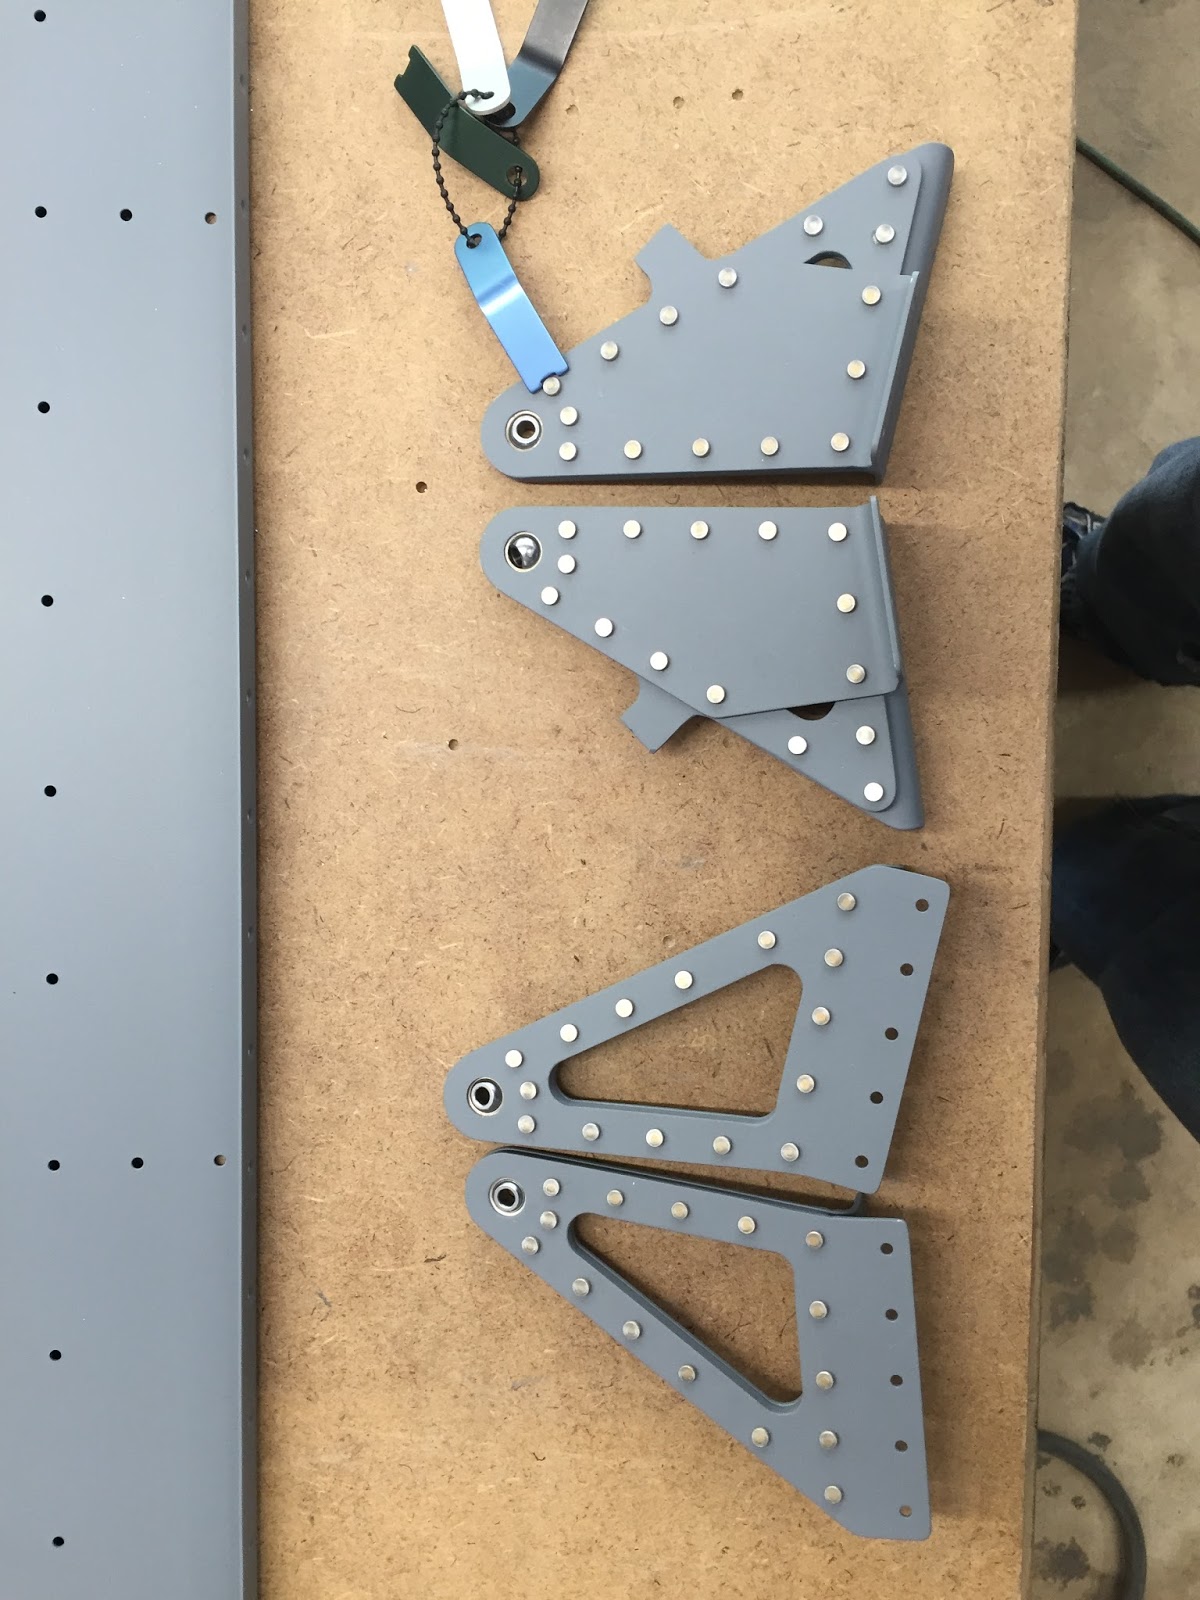
Here are the left and right wing, inner and outer aileron support brackets.
Before attaching the sub spars to the wing, you rivet the doubler pieces to the spar leaving empty holes where the ribs will be riveted later.
Here is how the aileron support brackets attach.
Here's the spars with doublers attached. Tomorrow these will be riveted to the ribs.
Hours: 6
Here I'm using a 5/8" and a 7/16" socket and my vise to seat a bearing in the aileron bracket inner support piece. The bearing body is a tight fit, but once properly inserted, the bearing moves freely.
These three pieces get riveted together and combined capture the bearing. The pockets in the side pieces still had clearance even after priming, although, I was careful not to load up too much primer in the sockets.
Here are the left and right wing, inner and outer aileron support brackets.
Before attaching the sub spars to the wing, you rivet the doubler pieces to the spar leaving empty holes where the ribs will be riveted later.
Here is how the aileron support brackets attach.
Here's the spars with doublers attached. Tomorrow these will be riveted to the ribs.
Friday, April 15, 2016
Thursday, April 14, 2016
Section: 15
Hours: 6
I finished prepping the sub-spar parts. I match drilled, deburred, counter sank and dimpled. When I finished all that, I washed and acid etched everything.
Counter sinks in the doubler plate.
Hours: 6
I finished prepping the sub-spar parts. I match drilled, deburred, counter sank and dimpled. When I finished all that, I washed and acid etched everything.
Counter sinks in the doubler plate.
Here's all the sub-spar parts ready for priming tomorrow.
Wednesday, April 13, 2016
Section: 15
Hours: 6
Today we continued work on the sub spar assemblies. I matched drilled several doubler plates. One of the plates has a hole for the aileron pushrod that has to be cut. I traced the hole shape from the spar and then drilled a couple rough holes using the step drill.
When I purchased my Dremel I also ordered a set of bits from Amazon. The set included a bit that looks like an end mill, which I chose to rough out the hole.
I clecoed the doubler to the spar which already has the proper sized pushrod hole. Then I used Dremel to hog out the hole to approximate size.
Then I finished up with the sanding drum tool.
Here's the final cut after running the sanding drum over it.
There are several heavy doublers that I straightened and then dressed the edges.
After all the hole drilling, deburring, edge dressing and straightening, Woody and I clecoed the sub spar onto the left wing. Now it looks like we are making progress!
We also assembled the right wing. Tomorrow we will final drill holes and do some more countersinking, but that is a task that requires some early in the day clarity of thought and vision.
Hours: 6
Today we continued work on the sub spar assemblies. I matched drilled several doubler plates. One of the plates has a hole for the aileron pushrod that has to be cut. I traced the hole shape from the spar and then drilled a couple rough holes using the step drill.
When I purchased my Dremel I also ordered a set of bits from Amazon. The set included a bit that looks like an end mill, which I chose to rough out the hole.
I clecoed the doubler to the spar which already has the proper sized pushrod hole. Then I used Dremel to hog out the hole to approximate size.
Then I finished up with the sanding drum tool.
Here's the final cut after running the sanding drum over it.
There are several heavy doublers that I straightened and then dressed the edges.
After all the hole drilling, deburring, edge dressing and straightening, Woody and I clecoed the sub spar onto the left wing. Now it looks like we are making progress!
We also assembled the right wing. Tomorrow we will final drill holes and do some more countersinking, but that is a task that requires some early in the day clarity of thought and vision.
Tuesday, April 12, 2016
Section: 15
Hours: 4
I spent the afternoon filing, polishing, final drilling, filing, counter sinking, etc. Completed the prep work for the aileron hinge bracket assemblies. I used my rubber mallet on the thick inner components to flatten them.
Hours: 4
I spent the afternoon filing, polishing, final drilling, filing, counter sinking, etc. Completed the prep work for the aileron hinge bracket assemblies. I used my rubber mallet on the thick inner components to flatten them.
Subscribe to:
Posts (Atom)