Section: 46B
Hours: 6
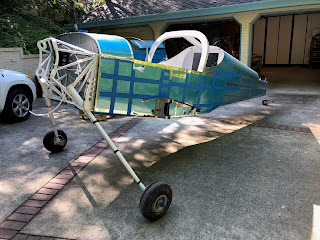
Day 2 working on landing gear leg fairings. Today I riveted piano hinges into the leg fairings. It took all day. Lots and lots of holes, counter sinks, rivets.
Step 1: Mark location of holes on the piano hinge. I scribed the hole locations into the hinge and then used a black marker to put a dot on the end holes so they would be visible through the fiberglass. I really only needed to mark the starting holes at each end, because I used a rivet fan to drill all the rest of the holes.

Step 2: Insert piano hinge such that end holes are evenly spaced from ends of the fairing which coincidentally left a full hinge loop at one end. Then I used cleco clamps to hold the hinge in place and drilled holes at the starting holes for each end being careful not to drill into the opposite side. Then I used the rivet fan to drill and the remaining holes, starting from one end working to the opposite end. I inserted clecos as I went and used light pressure on the drill so the piano hinge would not push away from the fairing. Then I counter sank all the holes for the rivet head.
Step 3: I inserted a spacer board to hold the back of the fairing open and then riveted the hinge on using the pneumatic squeezer.
The piano hinge is rather soft and the fiberglass has little rigidity so it was hard to ensure that the rivet would pull the hinge flush to the fiberglass. I found I had to use the rubber washer trick to squeeze the hinge firmly to the fiberglass. I also discovered it was really important to use a board spacer along the entire length of the fairing to hold the fairing open and keep the piano hinge flat with no sagging or bends.
After I finished the first fairing I noticed that the ends of the fairing were not being pulled together very well. I slightly adjusted the hinge position in the 2nd fairing a little further away from the trailing edge so that it would pull the fairing edges together with a little more force. That worked, but it also made it more difficult to insert the hinge pin. I used Boelube and eventually worked the pins into both fairings, but this is going to be a difficult task. Hopefully I will not have to remove/install the gear leg fairings very often...


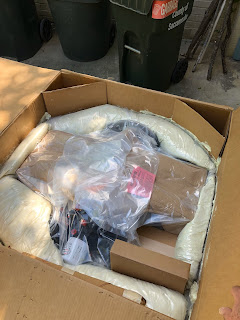
My E-Mag Electronic Ignition P model 114 magneto package arrived today. My IO-390 came from Lycoming with 2 Slick magnetos, but I have decided to go all electronic ignition. I ordered direct from E-Mag and they put together a kit for my IO-390 that included 2 model 114 magnetos, 2 wiring harnesses, 2 sets of spark plug adapters for auto spark plugs and 2 accessory kits (manifold tubing, serial port plug, wire). They also included 2 shorter studs and a timing gear to replace the studs and timing gear that come with the Slick that was set up with a recoil starting spring. I was going to order from Spruce Aircraft Supply, but the timing gear is really expensive and if you order from E-Mag direct it is a little cheaper because they get a deal from Lycoming.
Also included in the box was a package of gourmet popcorn. I'm not sure how to apply that to the mags- I guess I'll have to read the installation manual ;-)


