Saturday, June 30, 2018

Section: avionics
Hours: 4

I mounted the canopy frame to the fuselage today so I could check clearance for mounting the Garmin GTX 45R. It has to clear the canopy but also allow sliding it out of tray without hitting the fuselage side longeron.

Now that I have a seat I can sit in the cockpit and make pretend flying noises!

Thursday, June 28, 2018

Section: 47
Hours: 5

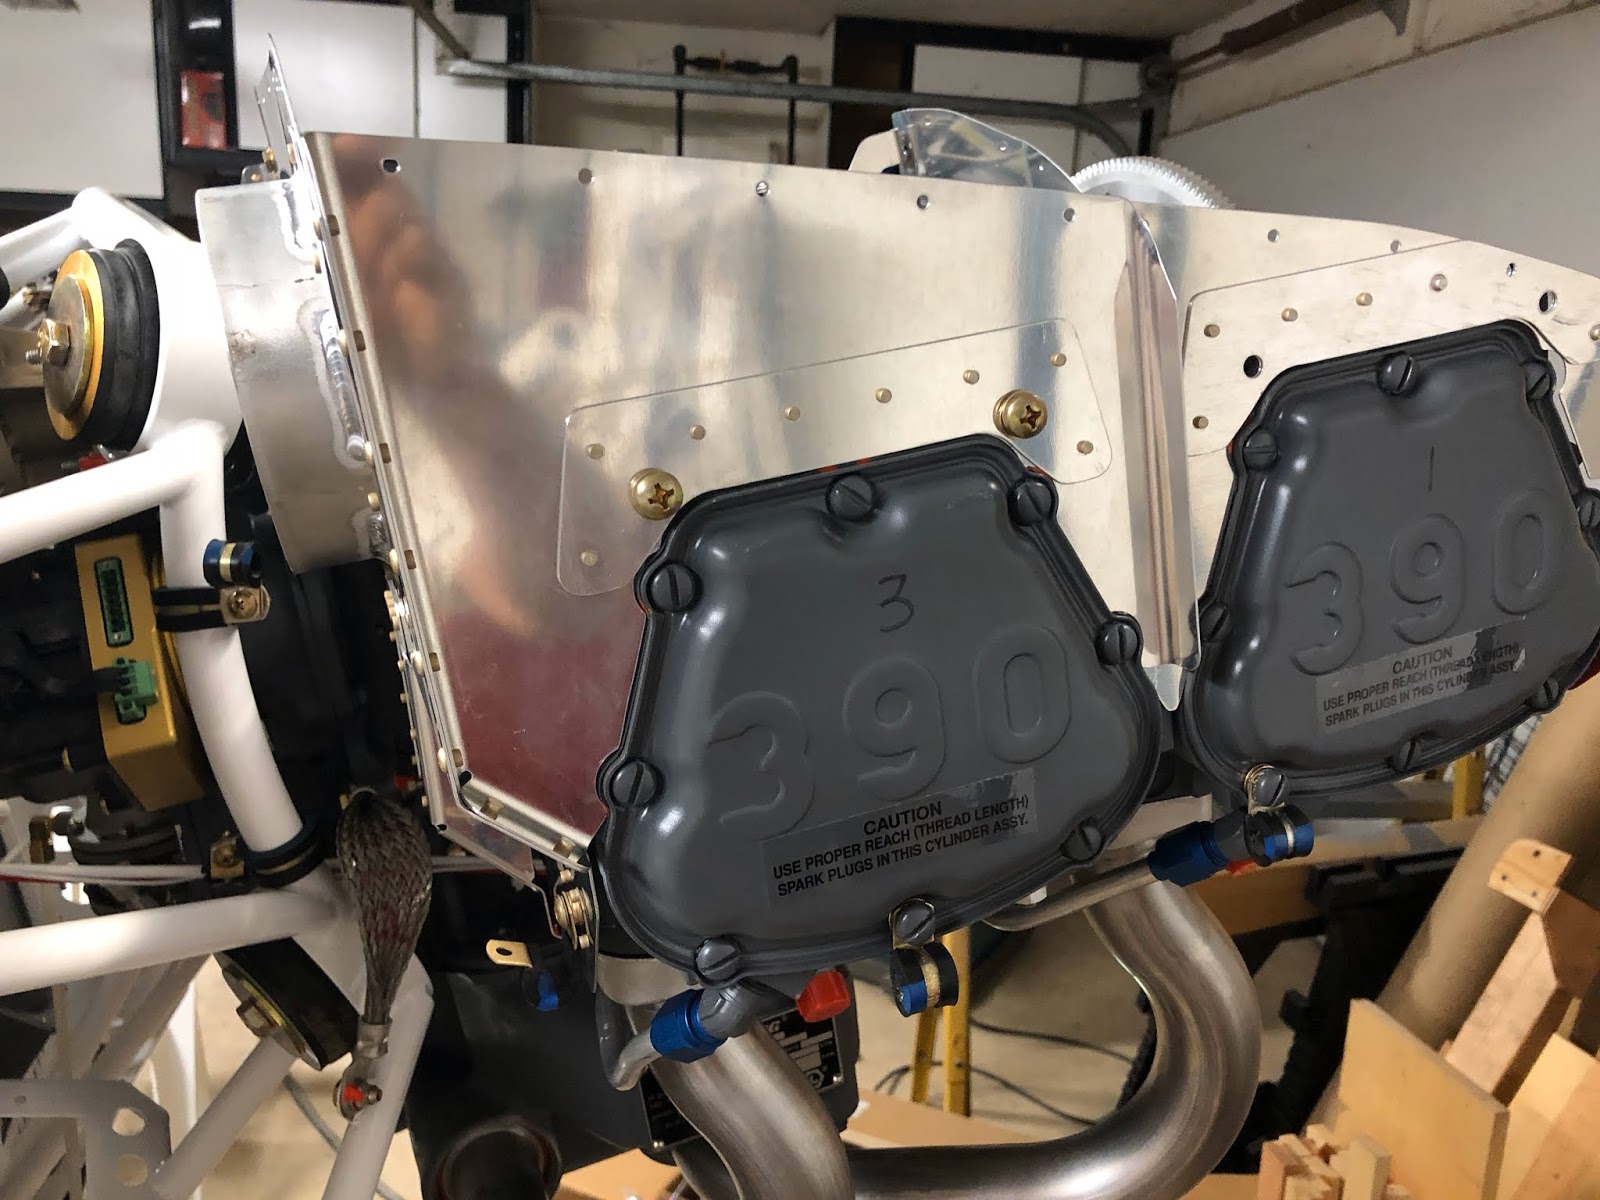
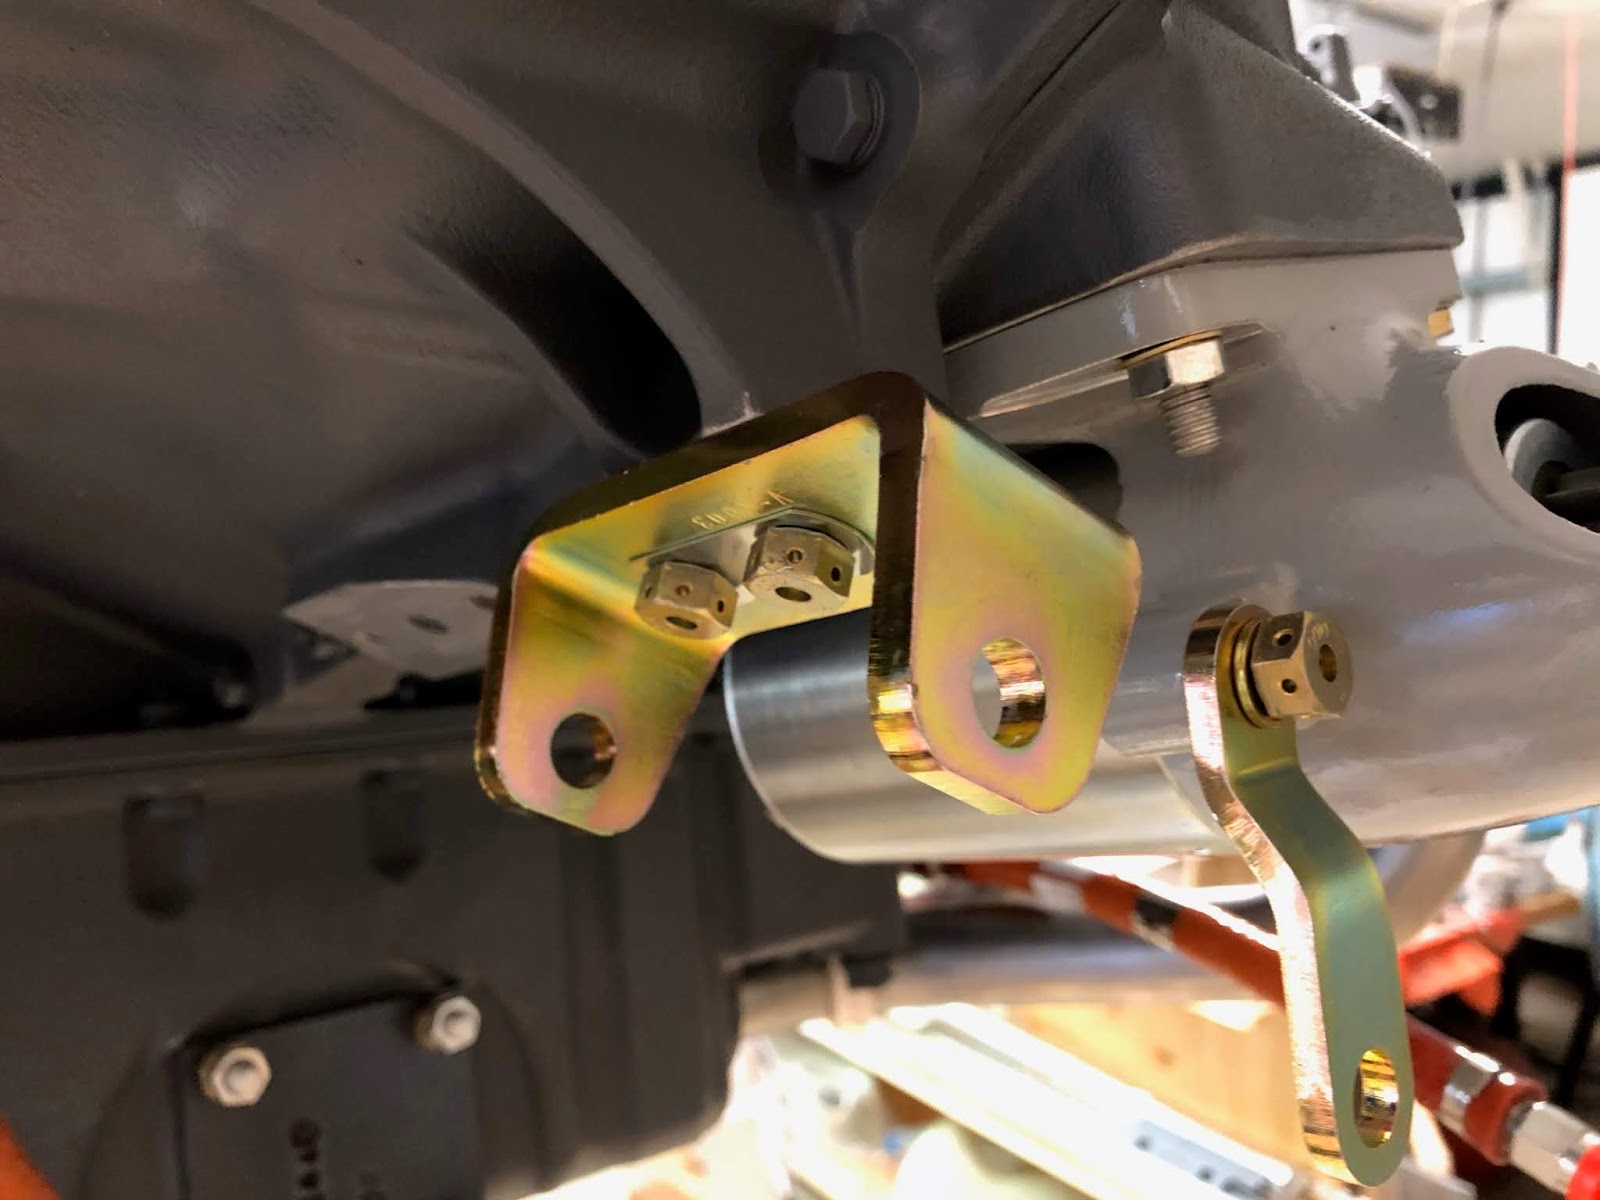
Today I installed the baffling. One tricky part is the screw that goes into the lower right back of the engine. It screws into an insert that is hidden in a port in the engine case. When I first removed the screw, I heard something drop on the floor. Luckily it dropped where I could easily find it and I figured out what it was. To attach the baffle in this area, you have to push the insert into the port hole in the engine case, line up the hole in the insert and then thread the bolt in all while holding the insert in place. Not and easy job...

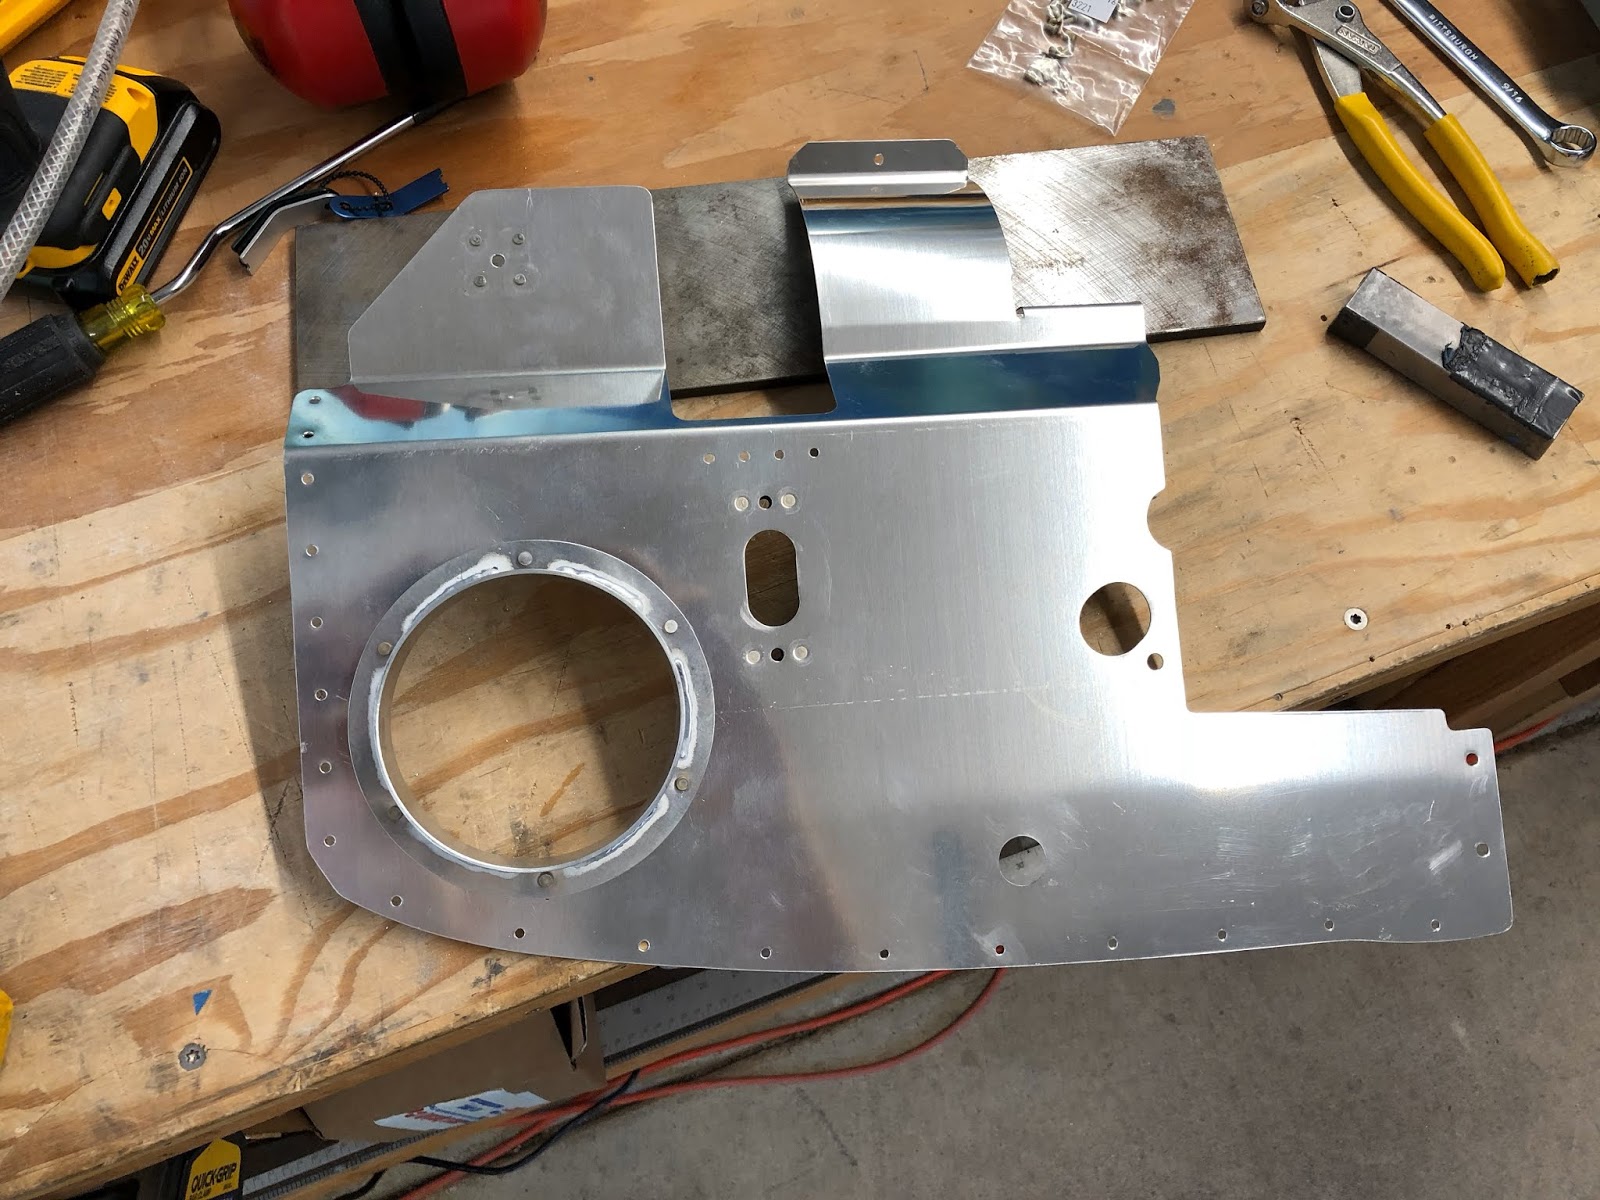
Here is the rest of the baffling installed.


A large box from Flightlines Interior arrived today!

Wednesday, June 27, 2018

Section: 43
Hours: 4

I mounted and wired the alternator.


Then I installed the oil temperature probe.

Tuesday, June 26, 2018

Section: 43
Hours: 5

Today I worked on wiring the starter and installing the alternator. First I installed the cable for the starter.

This is my favorite tool for installing adel clamps. It is a vise grip with a slotted nose. You clamp the ends of the adel clamp using the slotted nose then line up the adel clamp bolt holes by running an awl through them. Insert the bolt, run a nut onto the bolt and remove the vise grip. Works like a charm!


Next I started on mounting the alternator.


Monday, June 25, 2018

Section: 43
Hours: 4

I installed fuel system plumbing today, including the red cube fuel flow and tubing to the fuel pressure sensor and from the fuel pump.


Sunday, June 24, 2018

Section: 43
Hours: 5

My daughter and son in-law, Mike, came up for a visit this weekend so I had an extra hand available. The previous week I had reviewed the manual instructions for installing the engine and viewed various other blogs and articles written by previous builders. I rolled the fuselage out onto the driveway and leveled it. Mike and I were able to lift the engine into place and install the lord mounts and bolts pretty easily. The fit worked out great. The hardest part was torquing the nuts and lining up the cotter pin holes. Oh- and it was fun getting the cotter pins in place too...

Thanks for the help Mike!


Wednesday, June 20, 2018

Section: avionics
Hours: 7

The TCW backup battery will be located on the forward side of the sub panel just to the left of the map box, which will put it out of the way, but also make access a little difficult. The battery must be mounted with a standoff from the back of the sub panel because of the slight bend at the bottom of the panel. Instead of just using bolts with lock nuts, I decided to make some attachment clips with nut plates. The clips adjust for the stand off and should make it easier to screw the battery in place.


Monday, June 18, 2018

Section: avionics
Hours: 5

Today I fabricated the standoff channels that will attach the GTX 45R to the sub panel. I used some aluminum channel and drilled and tapped holes to screw the channel onto the angle clips that attach to the tray.


Saturday, June 16, 2018

Section: avionics
Hours: 6

I am going to use the map box for the B&C regulator and the termination block for the ground leads. I fabricated a door that will cover the map box opening. This will work out nicely- I can easily ground the termination block and the regulator through the door.


Thursday, June 14, 2018

Section: avionics
Hours: 4

I'm going to attach the Garmin GTX 45R to the pilot's side sub panel. Today I fabricated some aluminum angle pieces that I will use to attach the mounting tray to the supports. I drilled and tapped holes in the angle pieces so they can be attached using screws.

Wednesday, June 13, 2018

Section: avionics
Hours: 3

The avionics installation is not detailed by Vans, but left to the builder to install. I am slowly working through how to mount everything. I decided to mount the VPX between the instrument panel and sub panel on a swing down hinge for easy access and removal. Today I fabricated some aluminum channel and plate that will attach to the VPX box.


Monday, June 11, 2018

Section: 24
Hours: 4

Today I wired up the nav and strobe lights. First I made 2 connector harnesses with a coax shielded section of wire.

I made the harness long enough to reach from the wing tip to the connector on the end rib of the wing. This harness also has to be long enough so it can be routed to minimally interfere with the NAV antenna which will be added later.

Here they are lit up using a small 9 volt battery. These will be very bright when connected to ship power.


Sunday, June 10, 2018

Section: 47
Hours: 2

I fabricated several tension rods for the baffling. I tried to cut the threads on the end of the rods using a cheap Harbor Freight die set without any luck, so I went to the hardware store and bought a slightly less cheap tap and die set. The better die combined with proper application of thread cutting oil die a fine job.

Section: 24
Hours: 5

I worked on installing the navigation and strobe lights in the wing tips. First I cut out holes in the wing tips to allow the PCB to sit flush. Then I trimmed the PCBs to fit in the wing tip by sanding down and beveling the edges. Next I trimmed the clear plastic lens cover.


Friday, June 8, 2018

Section: 47
Hours: 2

The manual calls out that RTV be applied to several sections of the baffling. I taped off the areas and applied the RTV using a popsicle stick and spreading it evenly using an old credit card for a squeegee.

Thursday, June 7, 2018

Chapter: avionics
Hours: 8

I mounted the GEA 24 box on the GTR 45R tray and then moved the instrument panel and wiring harness into the fuselage. The harness will have to be routed behind the sub panel and sorted out, but I was able to make many of the connections to the panel equipment today.


Wednesday, June 6, 2018

Section: 43
Hours: 1

The tach drive port cover was not included in the kit so I ordered it from Vans. The part arrived today and I installed it on the engine.

Section: 47
Hours: 5

I continued fabricating the baffling.