Hours: 6.5
Today I finished up the right flap. All the trailing edge portions of the wing are done. I now have ailerons so I can bank. I have flaps so I can slow down to land. All I need is the rest of the wing, the forward fuselage, an engine, avionics, paint and a bunch of other minor details and I'll be flying. God is in the details though.
I started out the day riveting the bottom skin to the nose skin and spar. It was easier to lay the flap on the table than to leave it in the jigs. I clamped the top skin to the table to hold it in place and reached in between the skins to hold the tungsten bucking bar in place.
After the bottom skin is attached to the spar, you rivet the nose ribs in place with pull rivets. Woody really wanted to set a couple rivets, but we found the pull rivet tool just wasn't designed for someone without opposable thumbs.
Woody was upset at not being able to help so he ran off with the cleco pliers when I wasn't looking. It doesn't matter if you have opposable thumbs or not, you need the pliers to insert clecos. I found him in the back yard blowing off steam gnawing on the handle. I told him he may not be a great mechanic, but he can smell a bad rivet a mile away. That's why he's in charge of QC.
After pull riveting you glue the trailing edge wedge in place. Here are the trailing edge pieces with the adhesive tape applied to both sides.
You peel the tape off one side of the wedge and glue it to the flap skin. Then you pull the paper off the wedge and close up the assembly.
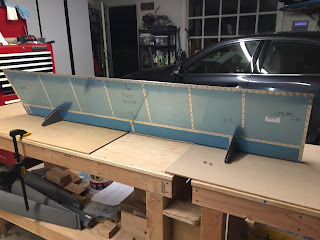
A couple hours and many rivets later and the another flap is together.
Here's s couple shots of the completed right flap.


No comments:
Post a Comment