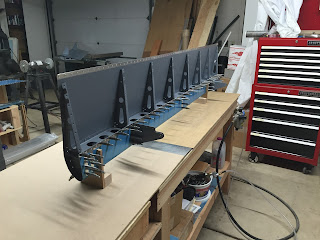
Hours: 5
The trailing edge of the flap felt firmly attached this morning, I guess the adhesive tape worked. I started out by riveting the bottom skin to the ribs using pull rivets for all but the end ribs. Then I set the trailing edge rivets. I first set about 24 evenly spaced rivets using the aluminum straight edge in combination with the squeezer so that the trailing edge was securely locked down and straight. I then finished up the remainder of the rivets using the back rivet plate. I initially set the rivets using the back rivet set in the rivet gun. I was able to form the shop heads so they were almost to the surface of the dimple. I then switched to the mushroom set and finished the shop heads flush with the skin.
I spent the rest of the day working on the right flap. As usual it was easier the second time around. I only had to drill out 1 rivet the rest of the day. I bet you could get pretty good at this by your 2nd or 3rd RV kit :-)
Start with the spar and ribs
Slip the nose skin over the hinge braces
Cleco the nose skin and set up in the jigs.
Top skin clecoed and ready for riveting.
Spar / skin and rib rivets finished. Setting up to back rivet the last 2 rivets on the ribs.
Back riveting the back 2 rivets in the ribs.
Top skin riveted to nose skin, spar and ribs.
Spar rivet line.
Spar and rib rivet detail.
Bottom skin clecoed in place and ready for riveting tomorrow.


No comments:
Post a Comment