Section: 18
Hours: 10
I decided to take advantage of the cooler weather today to do some more ProSeal work. ProSeal cures less rapidly when it is cooler which makes it easier to accomplish the work before it starts getting stiffer and stickier and gooier...
First up I installed the fuel level gauges. It took me awhile to figure out that there is a left and a right version. They aren't complete mirror images of each other, but the way they are attached to the mounting flange is different by 180°. I bent one of the legs not accounting for the radius of the bend and the arm ended up too long. I was afraid to straighten the bend so I put a kink in the arm to compensate (left gauge in pic below).
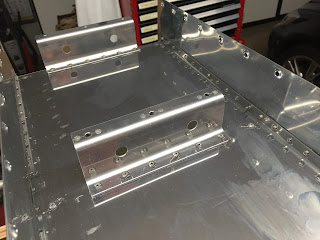
The mounting flange has an irregular spacing for the holes and only aligns with the tank assembly when the "MEXICO" stamping is towards the nose of the tank as seen here. After installing with a 1/16" thick layer of ProSeal you tighten down the screws to get a 1/32" layer. Then you check to make sure the lock washer behind 1 of the screws is properly making electrical contact between the tank and the flange.
Here's the gauge flange with the ProSeal squeezed out all around.
Inside view of the ProSeal squeeze out after tightening the screws.
Here's the left and right tanks next to each other showing the orientation of the gauges.
Here's the tank vent line connection at the inner rib. I initially wasn't sure if the nut that sits in the socket on the rib was supposed to have ProSeal applied. Early in the construction manual chapter it states that all mating parts or any place that fuel can seep through should be sealed with ProSeal. A couple threads on the Van's Airforce web site confirmed this also, so I slathered some ProSeal behind the nut before torquing it down and for good measure dabbed some on the outside of the nut.
Here's the outside of the vent line connection and the fuel gauge plate.
I had to bend the vent line more sharply to leave the required 1/4" clearance from the outside rib.
Now the hard part- I applied a bead of ProSeal using a popsicle stick on the tank skin mating area and the flanges of the end ribs. I also applied a thin dab where the z-stiffener rivets go into the rib flanges on the interior ribs. Then you slide the back baffle in (taking care to properly orient the baffle flange with the "EXTRA" hole on the bottom). Then apply a gazillion clecos and check that the ProSeal is properly squeezed out. If you leave too thick a ProSeal layer it can impact the fit between the tank and the wing spar.
Here's the baffle after clecoing and pulling the rivets on the z-stiffeners.
Then I squeezed the flange rivets leaving every tenth hole with a cleco inserted.
The flanges of the end ribs get solid rivets which I set using the rivet gun and bucking bar. That was especially messy because the ProSeal squeezed out of the end seam while riveting.
Here's the baffle with the rivets set. I haven't dabbed extra ProSeal on the heads of the rivets yet.


No comments:
Post a Comment