Hours: 8
The advantage of having 2 tanks to build is that the second one is easier. The disadvantage is there is twice as much work! Today I riveted in 3 more ribs and the j-stiffener on the right tank.
Here's what I've been using for handling the ProSeal. I always have a pile of paper towel wipes about 3" x 4" ready for cleaning. I keep a paper cup of acetone half filled. I dip a paper towel wipe in the acetone and then wipe off my fingers, bucking bar, clecos, etc. as needed while working. A real key to keeping the mess from spreading is to clean after each step of assembly. I use tooth picks for dabbing a little ProSeal in each hole before inserting a rivet. The q-tips come in handy for cleaning and for dabbing on extra ProSeal on each rivet head. I use popsicle sticks for mixing and spreading / buttering the ribs and for applying fillets where needed. I do all my mixing in paper bowls. The gram scale is very accurate for measuring the A and B parts in the 10:1 proportion required.
I wrote a little program to help with the weights and measures on the GraphNCalc83 app running on my iPhone ( https://itunes.apple.com/us/app/graphncalc83/id744882019?mt=8 ). To start a new batch of ProSeal, I first weigh the paper bowl and enter the Tare weight (typically 10 grams, but can vary bowl to bowl). Then I add the white part A of the ProSeal to the paper bowl and weigh the result and input it to the program Tare+A prompt. The program then calculates the total weight after adding the appropriate amount of part B. I set the scale to the calculated total and add the black part B until the scale balances. This may seem like over kill for a simple calculation, but it works really well, especially after breathing ProSeal fumes for several hours. The calculator doesn't lie :-)
I've been using about 30 grams of ProSeal for each rib. That is sufficient for buttering the flanges and dabbing an extra coat on the shop heads with some excess left over. I think an advantage of doing wet riveting is that you can use less ProSeal and still get good squeeze out and a good seal. I'm still working off the 1st quart can of ProSeal with 2 tanks nearly finished. I may finish up the whole job with just 1 quart.
Here is the outboard rib immediately after buttering and inserting it into the skin with some clecos. You can see some squeeze out is already occurring and the ends of the rivets I've inserted have a dab of ProSeal on the ends (which gets all over the bucking bar and makes a big mess...).
Here's the squeeze out on the inside after just clecoing.
Here I've inserted rivets in the holes between the clecos and I'm about ready to start riveting. Before inserting each rivet, I dab a little ProSeal with a toothpick in the hole to make sure the rivet gets sealed.
Here's the end result after riveting and dabbing ProSeal on each of the shop heads.
I added ProSeal on the inside to form a 3/8" fillet (end ribs only).
After putting in the ribs, I added the j-stiffener. Again, I enlisted Deb to help me insert the stiffener to minimize the mess.
Here I am dabbing ProSeal on each rivet of the j-stiffener. You just have to be patient and keep at it. The tanks have a lot more detail work that must be done right or you will end up with leaky tanks. The tanks on my Mooney have started leaking after 48 years of service so I'm a little sensitive about leaking fuel tanks- I'm happy to put in the extra work now to avoid fuel leaks in the future (not that I'm going to be flying 48 years from now)...
Here's one of the ribs in the middle of the tank showing the squeeze out and rivet head sealing.
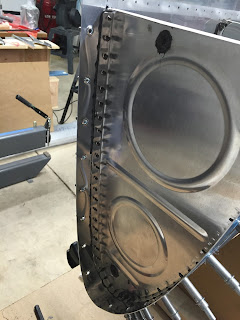
The right tank is almost done. The end of ProSeal mess is nearing- just another couple days of work.


No comments:
Post a Comment