Section: 10
Hours: 8
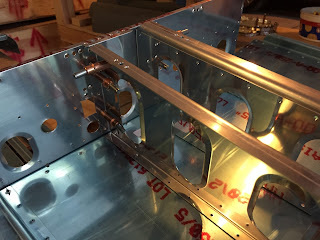
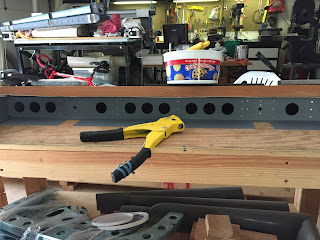
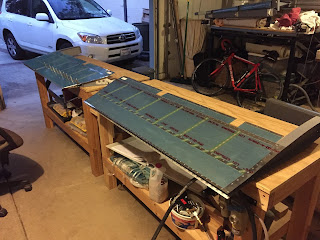
I riveted nutplates to the battery angles and F-01406 bulkhead then riveted the battery angles to the bell crank ribs.
Disclaimer: This blog is to provide others insight into my experience and for my own historical purposes. Airplane construction is a serious affair. I have no authoritative skills relating to airplane construction. As such, any use of the information contained on this blog is at your own risk.
Wednesday, September 30, 2015
Tuesday, September 29, 2015
Section: 10
Hours: 8
Back to riveting! Today I assembled the F-01411, F-01410, F01407 and F01408 bulkheads and associated doublers and attachments.
F-01411 Bulkhead
F-01410 Bulkhead
F-01408 Bulkhead
F-01408 Bulkhead
Hours: 8
Back to riveting! Today I assembled the F-01411, F-01410, F01407 and F01408 bulkheads and associated doublers and attachments.
F-01411 Bulkhead
F-01410 Bulkhead
F-01408 Bulkhead
F-01408 Bulkhead
Monday, September 28, 2015
Section:10
Hours: 9.5
Paint day! I washed, acid etched and primed the first batch of tail cone parts. It was a long day.
Hours: 9.5
Paint day! I washed, acid etched and primed the first batch of tail cone parts. It was a long day.
Sunday, September 27, 2015
Saturday, September 26, 2015
Section: 10
Hours: 8
I polished edges, deburred and dimpled holes in the F-01473-L & R skins and the F-01473A stiffeners.
I polished edges, deburred and countersank many holes in the F-01418B-L & R longerons to fit the skin dimples.
I polished edges, deburred holes and countersank holes in the F-01486A and B left and right stiffeners.
Friday, September 25, 2015
Section: 10
Hours: 8
I polished edges and holes of the F-1408-L & R bulkheads and final drilled and dimpled the holes in the flanges.
I polished edges, drilled and counter sank holes in the F-1037B & C battery angles.
I prepped the F-1429 bell crank ribs and match drilled the battery angles to the ribs.
I dimpled all the #40 holes in the F-01478 bottom skin.
I prepped the stiffener channels and dimpled the #40 holes in them.
Then I trial assembled the bottom skin to the ribs, stiffeners and bulkheads.
Thursday, September 24, 2015
Section: 10
Hours: 8
I dressed the edges and match drilled and dimpled the parts for the F-01410A bulkhead
I dressed the edges and internal holes and dimpled the #40 holes in the F-01408-L & R bulkheads
Hours: 8
I dressed the edges and match drilled and dimpled the parts for the F-01410A bulkhead
I dressed the edges and internal holes and dimpled the #40 holes in the F-01408-L & R bulkheads
Wednesday, September 23, 2015
Section: 10
Hours: 8
I shaped a few more tail cone parts from angle stock and rounded up the tail kit components and began the process of deburring, dimpling and edge polishing.
Hours: 8
I shaped a few more tail cone parts from angle stock and rounded up the tail kit components and began the process of deburring, dimpling and edge polishing.
Not pictured: I prepped the F-01411A & B bulkheads and match drilled the hstab attach bars
Tuesday, September 22, 2015
Section: 10
Hours: 8
Today I start on the tail cone. I cut and shaped several parts from angle stock provided in the kit. Rough cuts were made using my band saw and the I used the belt sander and polishing wheel to finish the parts.
It took more than a few twangs with the mallet to get the hstab attachment bars flat.
Sunday, September 20, 2015
Hours: 8
To finish the assembly of the elevators, I inserted the rear spar and weighted down the assembley under a straight board to prevent warping. The rear spar is attached with pull rivets to the internal ribs and then riveted to the skins.
The outer edges of the skin are riveted with flush rivets.
I couldn't squeeze the rivets in this corner of the rear spar and non of the regular rivet gun sets would fit either. I finally used the rivet set holder from my Cleveland C-Frame inserted in my rivet gun with the a 3/16" round set die inserted.
The angle corner brace was a bugger to rivet. I drilled out at least one rivet before I got it.
I was able to use the squeezer to set the flush rivets along the rear spar. Had to be careful not to squish any of the hinge laces. I used the rubber washer trick to make sure the skin, hinge and rear spar all came together snugly.
To set the end rivet on the rear spar, I had to grind off a corner of the special bucking tool so I could get it securely under the skins and into the corner.
Here's some pictures of the riveted together elevators. I'm going to hold off on gluing the pvc foam ribs until we get some cooler weather. It's been unusually hot for this time of year.
The trim tab is the first moving surface I've assembled so far. The hinge turned out nice and straight and the tab moves without any binding!
Subscribe to:
Comments (Atom)


