Section:
Hours: 8
I continued adding build log entries today and I'm almost caught up. I'm still refining the format of the site and I need to go back and proof read everything, but I can do that in the future when I have project downtime (or would just rather be sitting at the computer ;-).
LOL- I added so many entries in the last 2 days that the Blogger software started accusing me of being a robot! I had to fill in Captcha challenges multiple times to add the last couple posts today.
Friday, November 20, 2015

Thursday, November 19, 2015
Section:
Hours: 9
I FINALLY established this construction log. From the beginning of the project I've been marking up the construction manual pages with notes and dates of completion. I've also been taking numerous photos with my iPhone of work completed or in progress to document construction technique and quality. Today I pulled these sources together and created "Smash's RV-14 Build". I wish I had started it earlier- there are a lot of entries to create and I was only able to post entries up to mid October before calling it a day.
I searched for some time for an appropriate set of software for generating the log. I actually experimented with a Wordpress blog for awhile but was not happy with it. Then I noticed that several builders were using Blogger. I already had a Google+ account so I was somewhat familiar with the Google tools approach to building sites and it wasn't too hard to get going with Blogger. So far I'm happy with it, but time will tell...
Hours: 9
I FINALLY established this construction log. From the beginning of the project I've been marking up the construction manual pages with notes and dates of completion. I've also been taking numerous photos with my iPhone of work completed or in progress to document construction technique and quality. Today I pulled these sources together and created "Smash's RV-14 Build". I wish I had started it earlier- there are a lot of entries to create and I was only able to post entries up to mid October before calling it a day.
I searched for some time for an appropriate set of software for generating the log. I actually experimented with a Wordpress blog for awhile but was not happy with it. Then I noticed that several builders were using Blogger. I already had a Google+ account so I was somewhat familiar with the Google tools approach to building sites and it wasn't too hard to get going with Blogger. So far I'm happy with it, but time will tell...
Wednesday, November 18, 2015
Section: 17
Hours: 5
I separated the connector strip from the wing tank skins using the cutoff wheel on my Dremel tool. I then filed and polished the edges of the 4 wing leading edge skins. The landing light ports were fairly jagged but cleaned up nicely with the die grinder / scotch brite wheel.

Gas cap hole polished and deburred.
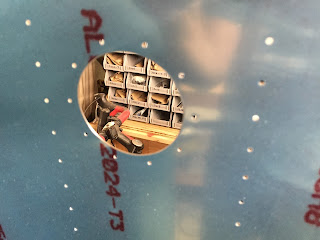 Landing light port smoothed and polished.
 Tank connector strips cleaned up, final drilled and dimpled for #8 screws.

 Left LE wing skin mounted in cradles ready for next step.

Hours: 5
I separated the connector strip from the wing tank skins using the cutoff wheel on my Dremel tool. I then filed and polished the edges of the 4 wing leading edge skins. The landing light ports were fairly jagged but cleaned up nicely with the die grinder / scotch brite wheel.

Gas cap hole polished and deburred.


Tuesday, November 17, 2015
Section: 17
Hours: 6
I smoothed the nose flanges, fluted the flanges and final drilled and dimpled the holes. in the outboard wing leading edge ribs. Fluting these large ribs is like squeezing toothpaste in the toothpaste tube. I had more problems with these than any of the ribs in the empennage, but they all sit flat, the flanges are 90 degrees to the table and the holes all line up in a straight line.
I also trimmed 4 of the ribs to fit where the spar caps are wider at the inboard section of the wing (per dimensions given in the instructions).
I cut trim tabs off of the access door frame and finished the edges of the landing light mounting brackets.


Hours: 6
I smoothed the nose flanges, fluted the flanges and final drilled and dimpled the holes. in the outboard wing leading edge ribs. Fluting these large ribs is like squeezing toothpaste in the toothpaste tube. I had more problems with these than any of the ribs in the empennage, but they all sit flat, the flanges are 90 degrees to the table and the holes all line up in a straight line.
I also trimmed 4 of the ribs to fit where the spar caps are wider at the inboard section of the wing (per dimensions given in the instructions).
I cut trim tabs off of the access door frame and finished the edges of the landing light mounting brackets.


Friday, November 13, 2015


Wednesday, November 11, 2015


Subscribe to:
Posts (Atom)