Section: avionics
Hours: 3
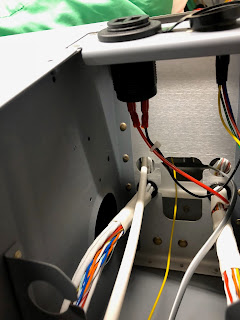
I started work on installing the GEA 24 sensor wiring harnesses. I pulled all the wires through the left firewall through hole, but now I believe it might be better to route the wires for the right side of the engine through the firewall through hole on the right side...
Disclaimer: This blog is to provide others insight into my experience and for my own historical purposes. Airplane construction is a serious affair. I have no authoritative skills relating to airplane construction. As such, any use of the information contained on this blog is at your own risk.
Wednesday, August 29, 2018
Monday, August 27, 2018
Section: avionics
Hours: 3
I installed the FlyLeds controller board under the pilot seat and connected it to the wiring harness.
Hours: 3
I installed the FlyLeds controller board under the pilot seat and connected it to the wiring harness.
Thursday, August 23, 2018
Section: avionics
Hours: 6
I finally have all the parts in hand for assembling the electrical system tying the alternators to ships power system. One shunt came with the firewall forward kit from Vans, but since I am installing a backup alternator, I had to order another shunt, fuse and fuse holder.
I am going to place the fuses and shunts on the motor side of the firewall close to the battery contractor. I laid out the bolt holes on an aluminum plate that will hold all the parts.
Then I fabricated copper buss connectors to tie the shunts to the fuse holders and to tie the fuse holders to the electrical system. The lead from each alternator will connect to the shunt for that alternator.
Here is the assembly with the fuses installed.
Wednesday, August 22, 2018
Tuesday, August 21, 2018
Section: 49
Hours: .5
I riveted the oil cooler air inlet assembly together.
Section: 50
Hours: 3
I installed the cabin heat cable on the pilot's side. I decided to replace the cables that come with Van's fire wall forward kit with cables that have a pushbutton lock. Some previous builders had recommended this so that you can firmly hold the heat doors closed during the summer.
I trimmed the cable to the correct length with the dremmel tool. Then spent quality time under the panel installing the adell clamps and connecting the cable to the heat flap lever arm.
Heres the cabin heat cable with the push button lock installed in the control panel.
Section: avionics
Hours: 1
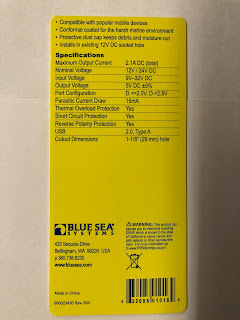
I decided to replace the cigarette lighter with a dual USB charger. There are a lot of these chargers available on Amazon, but the one I got was a little more expensive but supposedly does not radiate a bunch of electrical noise and won't interfere with the radios and intercom.
Monday, August 20, 2018
Friday, August 17, 2018
Section: avionics
Hours: 4
I'm planning out how to place the shunts for the primary and secondary alternators. I ordered from Amazon some small inline fuses and fuse holders and a couple mounts for the shunts. I also purchased some brass bar and copper sheet from the the Lowes.
Hours: 4
I'm planning out how to place the shunts for the primary and secondary alternators. I ordered from Amazon some small inline fuses and fuse holders and a couple mounts for the shunts. I also purchased some brass bar and copper sheet from the the Lowes.
Wednesday, August 15, 2018
Tuesday, August 14, 2018
Monday, August 13, 2018
Section: 38
Hours: 5
I painted a top coat of epoxy on the air vents, a couple of the cabin floor panels and the cabin rear closure panel.
Hours: 5
I painted a top coat of epoxy on the air vents, a couple of the cabin floor panels and the cabin rear closure panel.
Saturday, August 11, 2018
Section: 41
Hours: 6
The weather is good and I have a just enough primer left to finish the wing root covers and stiffeners and the prop spinner bulkhead.
Hours: 6
The weather is good and I have a just enough primer left to finish the wing root covers and stiffeners and the prop spinner bulkhead.
Friday, August 10, 2018
Section: avionics
Hours: 3
I installed the mounting tray for the ELT and wired up the connector and antenna.
Hours: 3
I installed the mounting tray for the ELT and wired up the connector and antenna.
Subscribe to:
Comments (Atom)


